
February 12th, 2013
Update: Filetree fix,
contributed by M. Bausch.
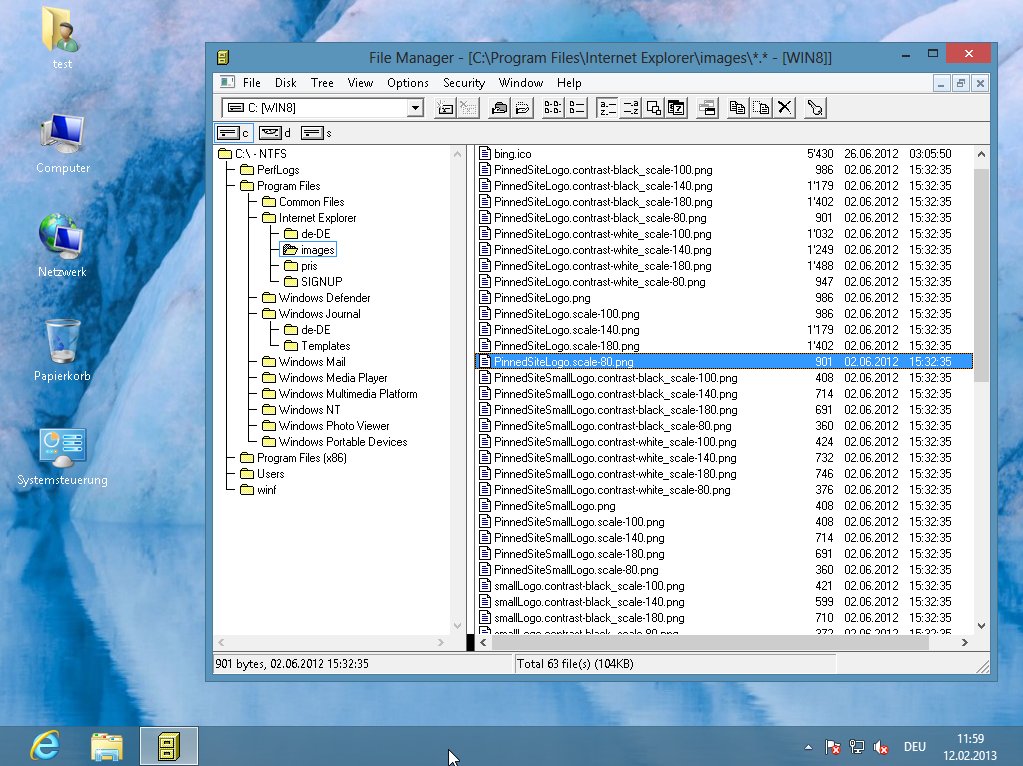
Some screenshots Win8/ Vista.
for file downloads look at the instructions below
for Windows the World has ever seen!
Unfortunately it didn't run anymore
under Microsoft Windows® Vista, Windows 7, 8, 10 and Windows Server
up to now...
 |
 |
 |
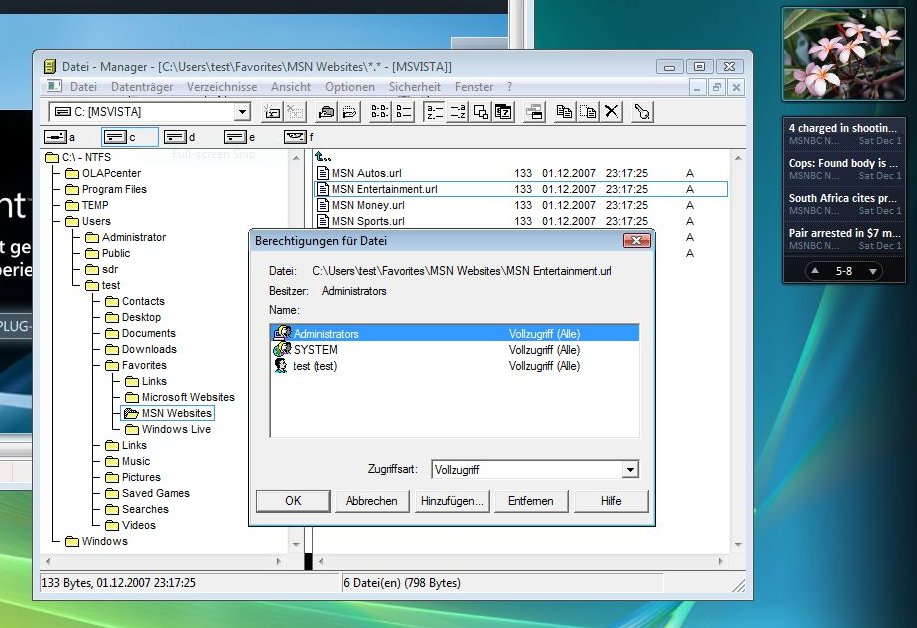
If you plan to use your File Manager to edit access
control list information too (2nd thumbnail screen shot), you need
some extra
preparations. Show me how... |
 |
Introduction That's what the World has really been waiting for: With the advent of Windows Vista, Microsoft modified certain library functions in a way it was no more possible to run good old File Manager (winfile.exe). With this website, the revival of one of the most clear, efficient and fastest file management tools under Windows has started. In those rare moments when I was using Windows Vista to work with, I was frequently annoyed by the slow and inefficient explorer application which was pumped with loads of True Color Icons, animated menubars, hidden folders, drive-abstracted desktop views and panes presenting you all possible operations to perform. For somebody who never worked with a computer before, explorer might be the best choice to start with, but for many other users it's just a nightmare. Thus I decided to write a small software that re-enables File Manager under the newer versions of Windows |
- You need the file manager executable (winfile.exe) from
Windows NT 4.0 in the desired language. It's contained in Windows
NT 4.0 Service Pack 6a (sp6i386.exe, in your language), which can
still be downloaded from some Microsoft or other websites. Due to copyright issues I cannot provide the Service Pack or any other programs here that are owned by a 3rd party manufacturer.
If you already
have a 32-bit NT-version of the File Manager with long filename
support, you can skip this step. Once you have downloaded your Service
Pack, just execute it this way:
sp6i386.exe /X . This will open a window prompting you to enter a directory where to extract all files of the Service Pack without installing them. When you are done extracting the files, copy winfile.exe (which is found inside directory of the extracted files) to a working directory.
- File Manager needs some helper files to start under Vista, Win7, Win 2008 and later.
Download them here and copy them
to the working directory where you placed winfile.exe.
- Finally File Manager (winfile.exe) has to be revived in order to make use of the helper files instead of the native Windows libraries with those it wouldn't work with. Download the wfrevive program to your working directory.
- Run wfrevive.exe in the working directory, where winfile.exe is located. (Make sure no virus background scanner/ file protection shield is enabled at this time, as wfrevive.exe has to modify winfile.exe)
- You're done. just run winfile.exe
and enjoy!
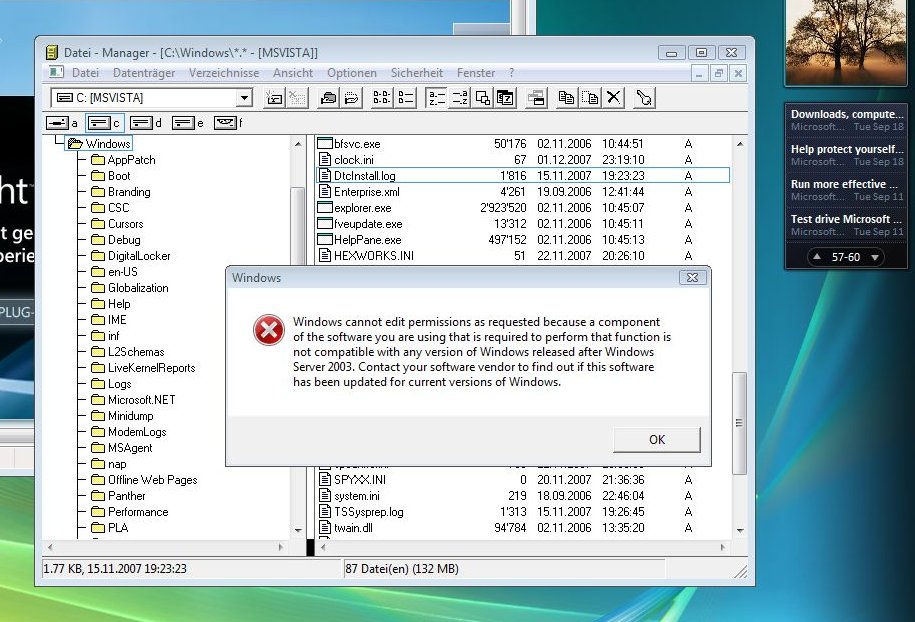
- These extra steps are required to follow, if you want the
access control list (ACL) editor in the File Manager work too (menu
"Security", entries "Permissions", "Owner", "Audit"). You will need
some files from an installed Windows XP (of your desired language).
- Follow the steps 1-4 from the section above.
- Delete the acledwr.dll
file in your working directory.
- Copy the following files from your Windows XP \Windows\System32
directory to your working directory and rename them as follows
(originalname => newname):
- acledit.dll => acledwr.dll
- mpr.dll =>
mxp.dll
- mprui.dll => mxpui.dll
- netui0.dll => netxp0.dll
- netui1.dll => netxp1.dll
- netui2.dll => netxp2.dll
- acledit.dll => acledwr.dll
- Download this additional acl-function-revival program to your working directory and run xpaclptc.exe. (Make sure no virus background scanner/ file protection shield is enabled at this time, as xpaclptc.exe has to modify winfile.exe)
- This step is only required if you want to run the ACL editor under Windows 7/ Windows Server 2008, *not* for Windows Vista: Download this additional set of wrappers and unpack it to your work directory, overwriting the existing acledwr.dll and netxp1.dll produced in step 4. Thanks to Rob Foxtaur, who provided these new wrappers.
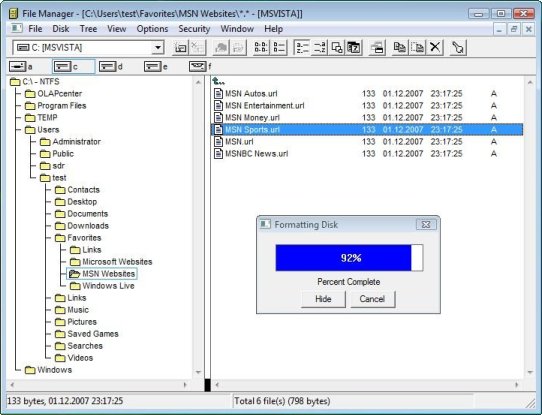
- You're done! To test it, run winfile.exe, select a file on
a NTFS-drive and select one entry of the "Security" menu (or click the
key-icon on the toolbar once you've selected a filename).
- If you encounter problems with the font
display like the ones shown below, navigate to the
"Options"/ "Font" menu and choose the font
"MS Sans Serif" instead of "Microsoft Sans Serif".
-
- If you cannot see all files with winfile.exe, if a plugin or its installation fails, if winfile doesn't save its settings (e.g. window sizes), or if you get strange error messages when opening, running or copying files, you should run it under the real administrator user (for compatibility reasons). The real administrator user is called "Administrator" on all Windows systems. It is disabled by default under Windows Vista and Windows 7. There are several ways to activate this powerful account (depending on the Windows version you are using). Have a look at Google on how to enable the Administrator account. Just assigning a normal user administrative privileges in the control panel usually doesn't work. If you cannot or if you don't want to run all your programs under the Administrator account, you might try using "runas", which allows to run a specific command, e.g. winfile.exe under another user with (usually) elevated privileges (e.g. the "Administrator"). I never tested this second possibility, but you might try it once.
- If you encounter any problem, don't hesitate to write me:
